
Syrotech GPON OLT Plug and Play Configuration for FTTH ONU or ONT
In this blog post, we will explore the seamless setup of Syrotech's GPON OLT Plug & Play configuration for FTTH (Fiber to the Home) ONU/ONT devices. With a focus on simplicity and efficiency, we'll guide you through the key steps to get your Fiber-to-the-Home network up and running in no time.
IPv4 Configuration :-
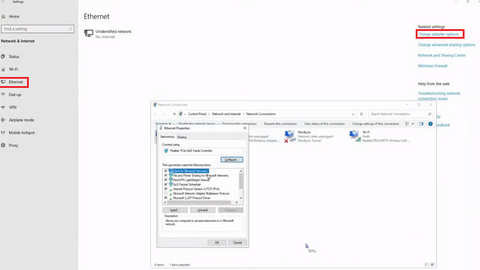
1.Let's Start with the IPv4 configuration. Open Network setting on PC and then select Ethernet followed by clicking on the change Adaptor option on the right side window.
2. Right click the ethernet and double click Internet Protocol version 4 , then enter IP address and subnet mask . Now click OK
VLAN & Uplink Configuration
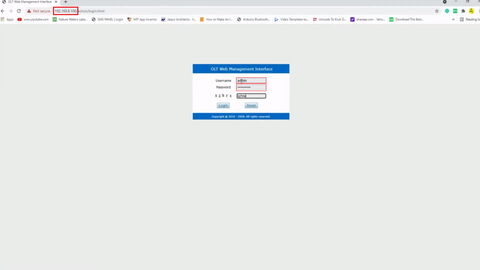
1.As usual, Enter the IP address on the browser and input the username, and password along with the verification code. Then click login
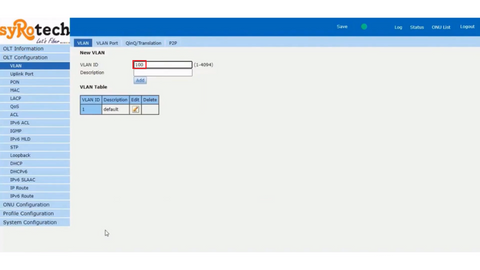
2. Select OLT Configuration > VLAN , then enter an VLAN ID (100) and description if needed. Then click Add
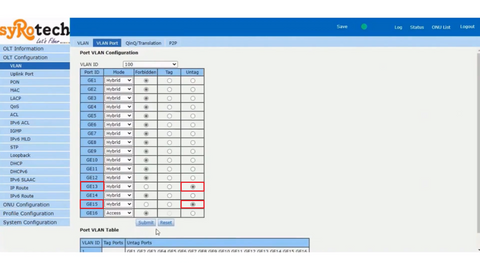
3. Next, migrate to VLAN > VLAN Port, Change the VLAN ID as created (100) and change the port from forbidden to untag mode. Later change to untag mode and click the submit button.
4. Once it is untagged, select Uplink > Configuration. Enter the description of port needed and PVID as 100 and then click submit.

After clicking the Submit button, we finished our VLAN & Uplink port configuration. Next , we are going to create a one Gigabit speed DBA profile.
Profile configuration
To create 1 Gbps of uplink on DBA Profile, follow the steps as below:
1. Click Profile configuration > DBA Profile > Add Profile , Select profile type as “ Type_4 “ and enter an Profile name.
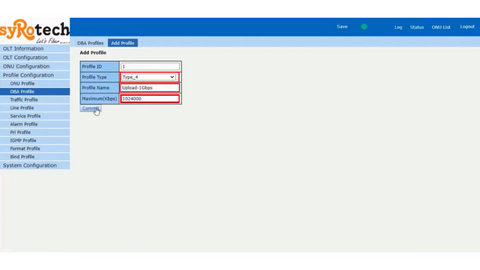
2. Once the profile name is entered followed by a maximum speed on kbps as 1024000, DBA profile is created
Line Profile
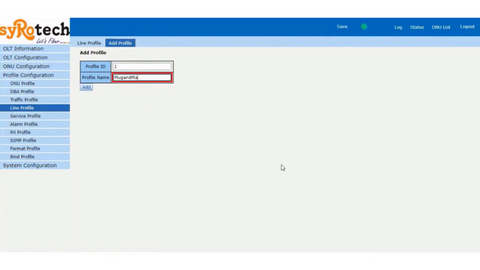
1. Next, to create an Line profile select Line Profile > Add Profile and then enter profile name as “PlugandPlay” as shown below
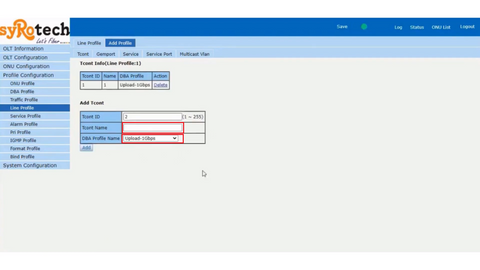
2. After the Profile is created, Click Modify or Delete on Line profile. Then enter TCONT Name and choose DBA Profile. Then click add.
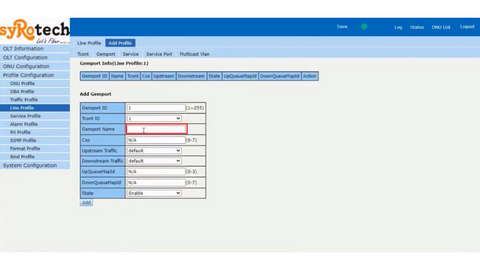
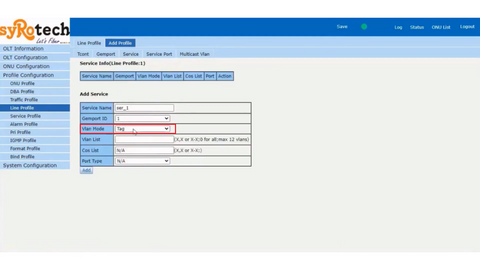
3. Following that, add Gemport. Click Gemport and enter the Gemport name as 1. Then click add
4. Once Gemport is added, move to service as select service and change VLAN mode from tag to untag and then click Add button.
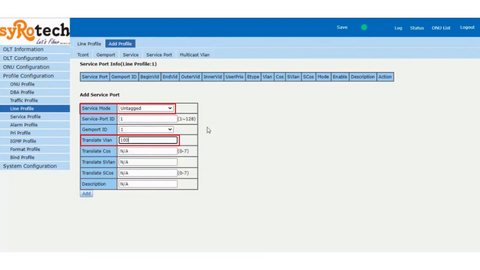
5. Next, Move to the Service Port. Change Service mode as untagged and Translate ID as 100 as shown below and then click ADD button
Service Profile
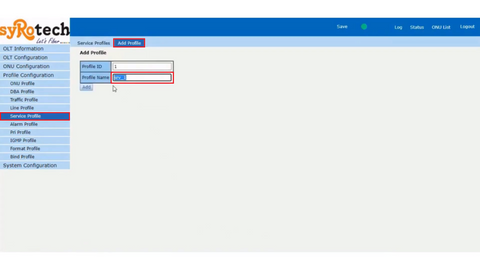
1. The next step is to create a service profile. Select Service Profile > Add Profile and then enter an Profile name (PlugandPlay) to add.
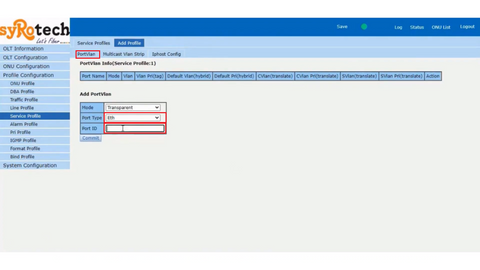
2. After that Click Port VLAN and enter VLAN ID as 1. Select port type as Veip and VLAN ID as 1 then click commit to set VLAN on the service profile.
3.Now the profile creation on syrotech olt as Plug is completed. So, bind all profiles as created.
ONU Configuration
To bind all the created profiles, click ONU Configuration > ONU Autolearn and make sure of plug and play disable. Then select PlugandPlay on both line and service profile as shown below.
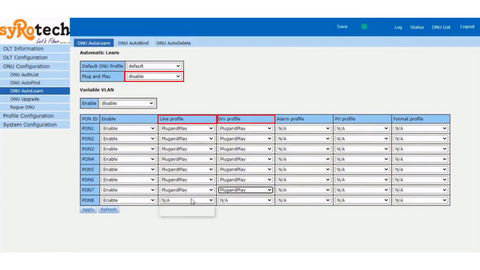
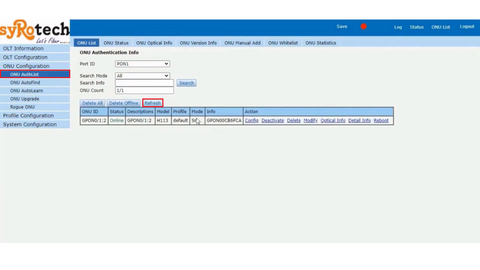
Finally, click the Apply button. To verify the profile as taken by ONU, select ONU AuthList and view the status by clicking refresh button.
After going through all the above details, you would have got a clear understanding of “how to configure a Syrotech OLT”. If you need help, just ping us (virtually or directly, depending on availability).
Note: Grabnpay will assist you with all technical solutions and troubleshooting issues. If you want visual understanding, please refer our youtube video https://youtu.be/dZAsQorisjk


